| Date tip published: | 11/29/2004 |
| Description: | Domino Designer 6 supports using Java for Domino agents. The Domino Designer client can be used to create, edit and compile Java agents. However, there is no debugger and the editor does not list the available methods as when coding LotusScript agents.
WebSphere Studio has an excellent Java editor and debugger, and supports Content Assist. Studio also has automatic code formatting and many other great productivity aids. This tip will show you how you can create a Domino agent using WebSphere Studio, import the agent into Domino Designer, and then use WebSphere Studio's debugger to debug the agent. |
To learn more about WebSphere Studio and writing Domino Java agents use the following links:
Beginner Java Programming for Notes Domino 6
Intermediate Java Programming for Notes Domino 6
WebSphere 5 for Domino Developers Package
Introduction to WebSphere 5 for Domino Developers
 Develop Domino Java Agents with WebSphere Studio Develop Domino Java Agents with WebSphere Studio
This tip will show you how to write and debug Domino Java agents using WebSphere Studio. The following software is required:
- Lotus Domino Designer 6 client
- WebSphere Studio 5
If you do not have WebSphere Studio than you can get a free trial version at IBM's website. TLCC has published a helpful tip on how to download and install this trial version.
Click here to view TLCC's tip on installing the trial version of WebSphere Studio.
There are several steps to writing and debugging a Domino Java agent:
- Write the agent code in WebSphere Studio
- Create the agent in Domino Designer and import in the class
- Debug (if necessary) the code in WebSphere Studio (this step will be covered in a future TLCC tip.)
This tip assumes you are familiar with WebSphere Studio, and can create a Java agent in Domino Designer. If you are not familiar with WebSphere Studio you may want to take TLCC's course, Introduction to WebSphere 5 for Domino Developer. TLCC also has a free demo version of the Introduction to WebSphere Studio 5 course available at the TLCC website.
Click here to get more information on the free demo version of Introduction to WebSphere Studio
 Procedure: Write the agent code in WebSphere Studio Procedure: Write the agent code in WebSphere Studio
The first step is to write the code in WebSphere Studio.
- In WebSphere Studio, choose Window | Open Perspective | Java to open the Java perspective.
- Either create a new Java project in Studio or go to an existing project. To create a new project in Studio choose File | New | Project from the menu. Choose Java as the project type and click [Next]. Name the project and click [Finish].
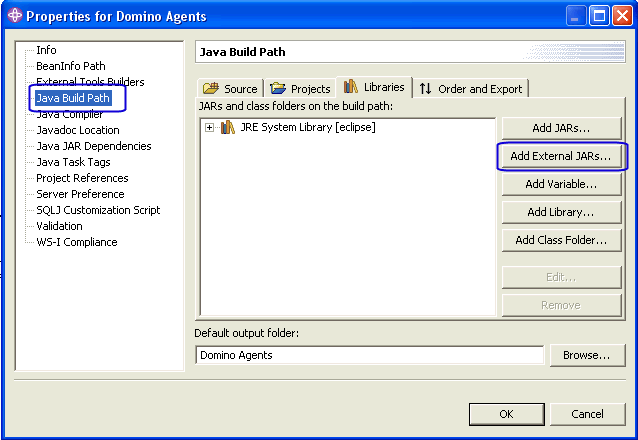
- Import in the Notes.jar class into your project. Right click on the Project name and choose Properties from the context menu. Choose Java Build Path on the left side. Click on the [Add External JARs...] button. Navigate to the Notes program directory and select to import the NOTES.JAR file. Click [OK] to import and close the Properties dialog.
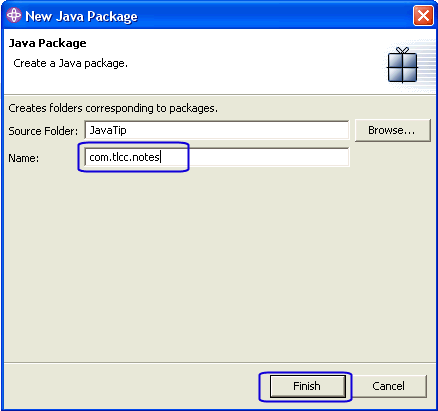
- Optionally, you can create a new package in by right-clicking on the Project name and choosing New | Package from the context menu. Supply a name for the package and click [Finish] to create.
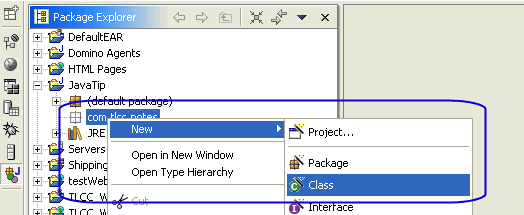
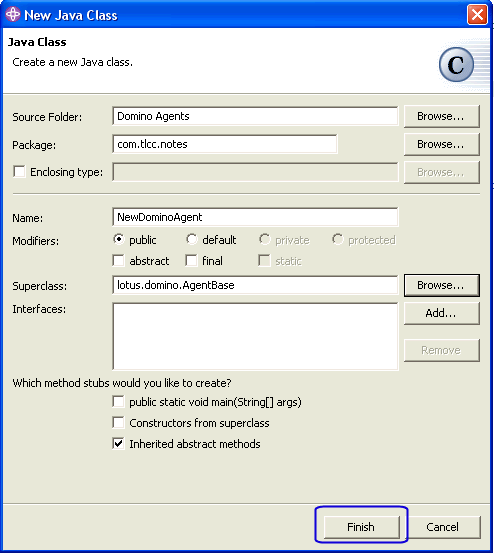
- Create a new class by right-clicking on the package where the new class should be created. Optionally, you can right-click on the Default Package. Choose New | Class from the context menu.
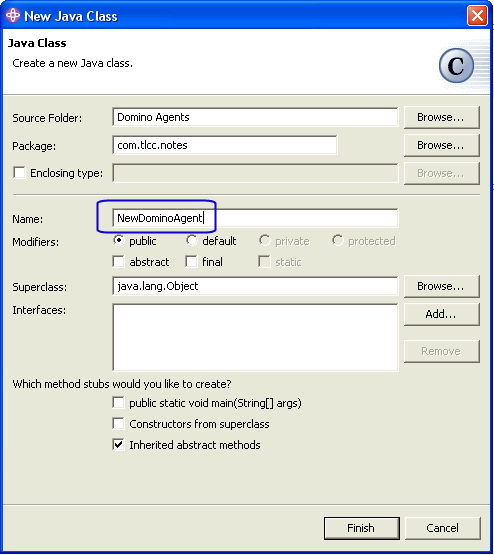
- Give the new class a name.
- Add a Superclass to the class by clicking on the [Browse] button. In the SuperClass Selection dialog, select "AgentBase" for the Type. The Qualifier should be lotus.domino. Then click [OK] to select the lotus.domino.AgentBase superclass.

- Click Finish to create the new class.
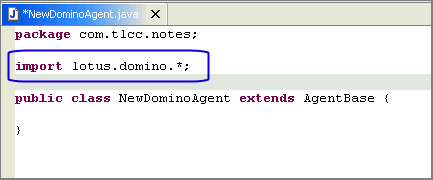
- The new class will open in the Editor. Change the import line to remove "AgentBase" and replace it with an asterisk as follows:
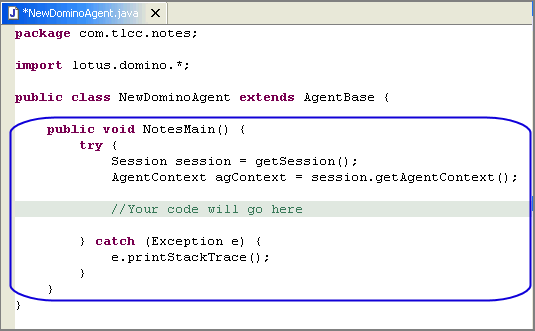
- The following code is used in all Domino agents. Type the code outlined in blue into the agent. (This text is also shown at the end of this procedure if you want to cut and paste it to your agent code.) If you have written a Java agent before in Domino Designer you will note that this is the same code that Domino Designer automatically inserts into all new Java agents.
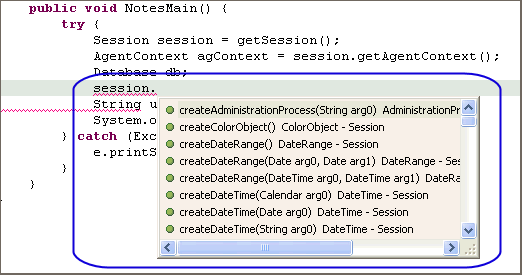
- You can now write your agent. You can use Content Assist when writing your code. For example, to use a method from the Session class type in "session." (with no quotes.) A list of all the methods in the Session class will be displayed. You can also place your cursor to the right of the period after the session variable and press <CTRL><SPACE> to get the Content Assist.
- Below is a sample agent that will display the name of the current Notes user in the Java console. To see the Java console in Notes choose File | Tools | Show Java Debug Console from the menu.
| package com.tlcc.notes; |
| import lotus.domino.*; |
| public class NewDominoAgent extends AgentBase { |
| public void NotesMain() { |
| try { |
| Session session = getSession(); |
| AgentContext agContext = session.getAgentContext(); |
| Database db; |
| String user = session.getCommonUserName(); |
| System.out.println("User name is " + user); |
| } catch (Exception e) { |
| e.printStackTrace(); |
| } |
| } |
| } |
 Procedure: Create the Agent in Domino Designer and Import the Class Procedure: Create the Agent in Domino Designer and Import the Class
Once the agent code has been written in WebSphere Studio it can be imported into any Domino agent(s).
- Create a new Domino agent in Domino Designer. Change the type of programming for the agent to Imported Java.

- Determine the path where the class file was stored in WebSphere Studio. Right click on the class name in the Package Explorer in WebSphere Studio and choose Properties.
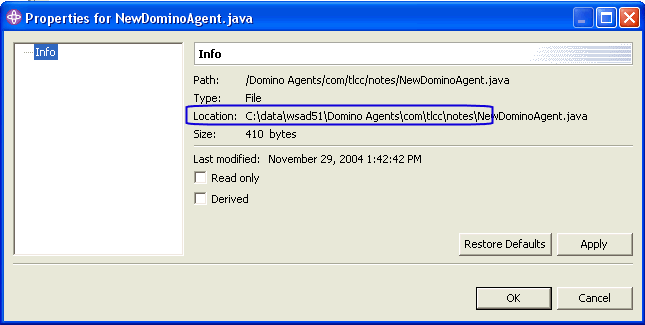
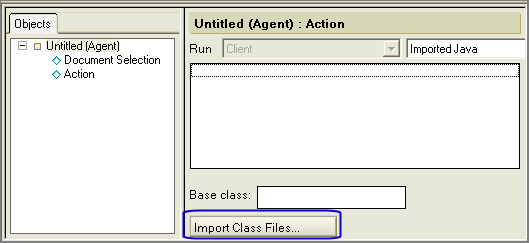
- Return to the Domino Designer client. Import in the class file for the agent created in WebSphere Studio by clicking on "Import Class Files..." at the bottom of the Programmers Pane.
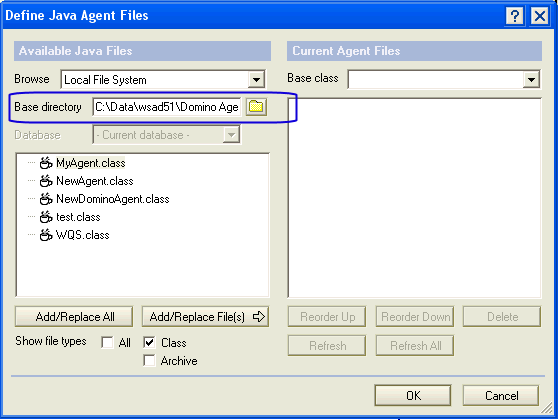
- Change the base directory to the path determined in step 2 above where the class file is stored.
- Choose the class file to import and click the [Add/Replace Fields] button. Be sure to choose the class file (the compiled code) and NOT the .java file (source code). You can view only class files by checking "Class" for the "Show file types" setting. Click [OK] when done to import in the class.
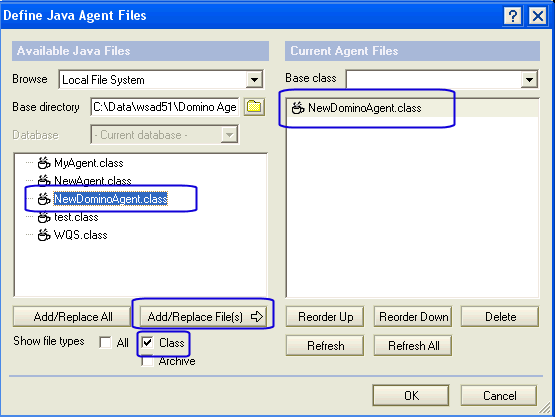
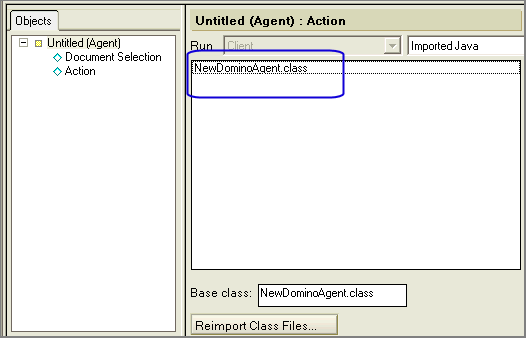
- The Agent will appear as follows:
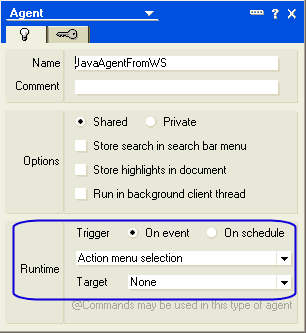
- To test out the agent change the properties to run from the Action menu with Target as "None". This way you can invoke the agent from the Notes client.
- Run the agent from the Notes client. The Agent should appear on the Actions menu. Once you are sure the agent works you can change the type to any agent trigger desired and the agent can also be set to run on a Domino server instead of a client. Any System.out output will appear in the Java debug console for a Notes client and on the Domino server console for server agents. To see the Java console in Notes choose File | Tools | Show Java Debug Console from the menu.
|